
Notes:
- The Ricoh printer scans documents using Scan to Email.
- Each user must select their own name as the email destination before scanning.
- The scanned document will be sent from scandoc@ocsports.com.my to your registered email address.
- If your name is not available in the destination list, please contact the IT Department for further assistance.
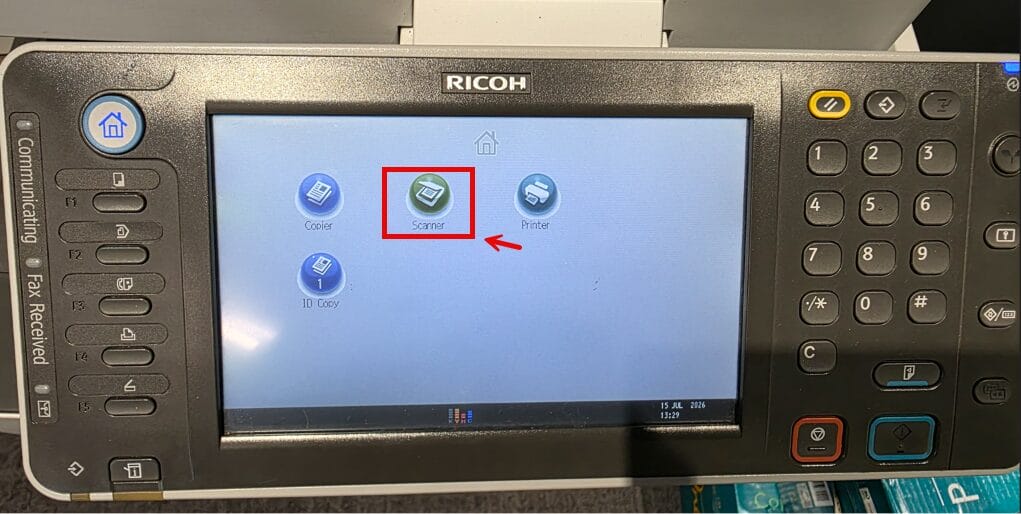
1. Select Scanner
On the Ricoh touch panel, tap Scanner.
2. Place Your Document
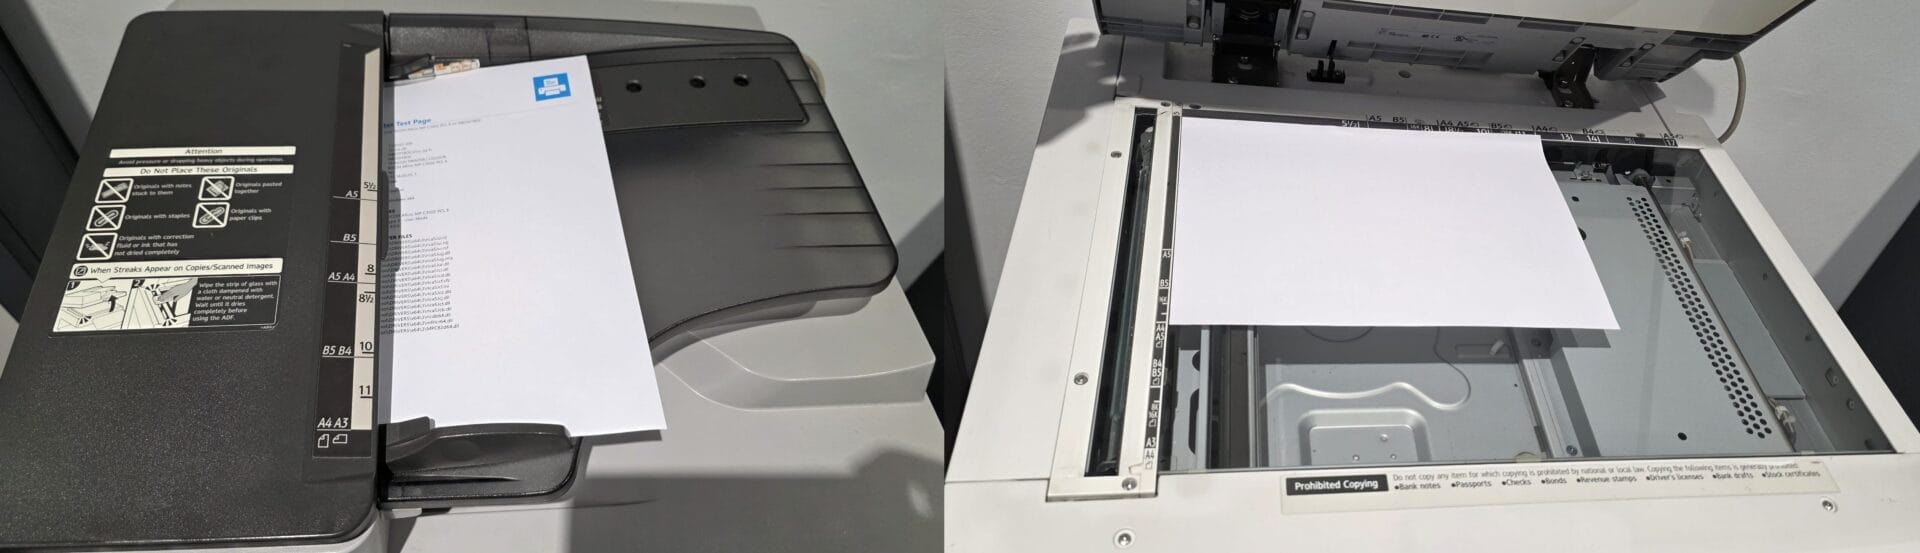
Place your document in one of the following locations:
- Automatic Document Feeder (ADF): Place multiple pages face up.
- Scanner Glass: Place a single page or book face down on the glass.
3. Select Your Email Destination
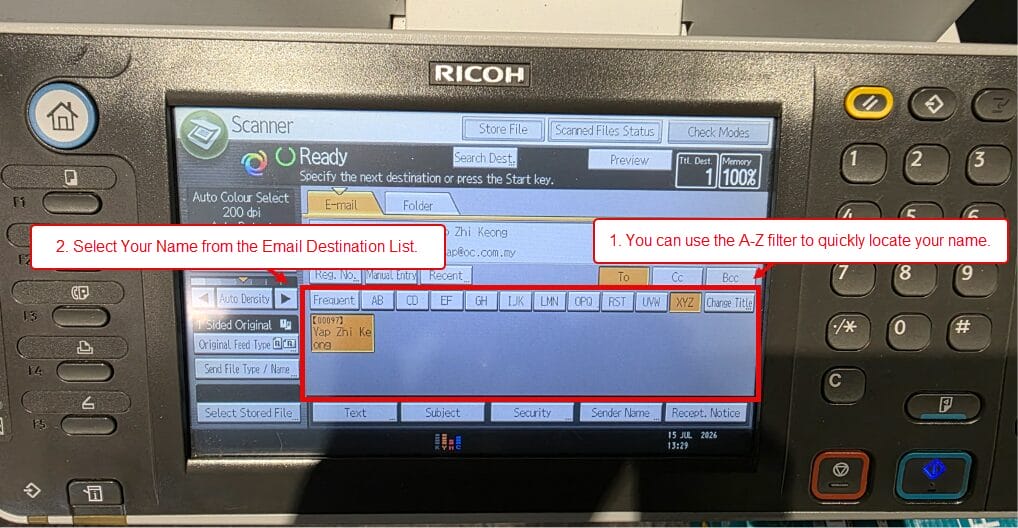
The printer will display the Email screen.
Select your name from the destination list. You can use the A–Z filter to quickly locate your name.
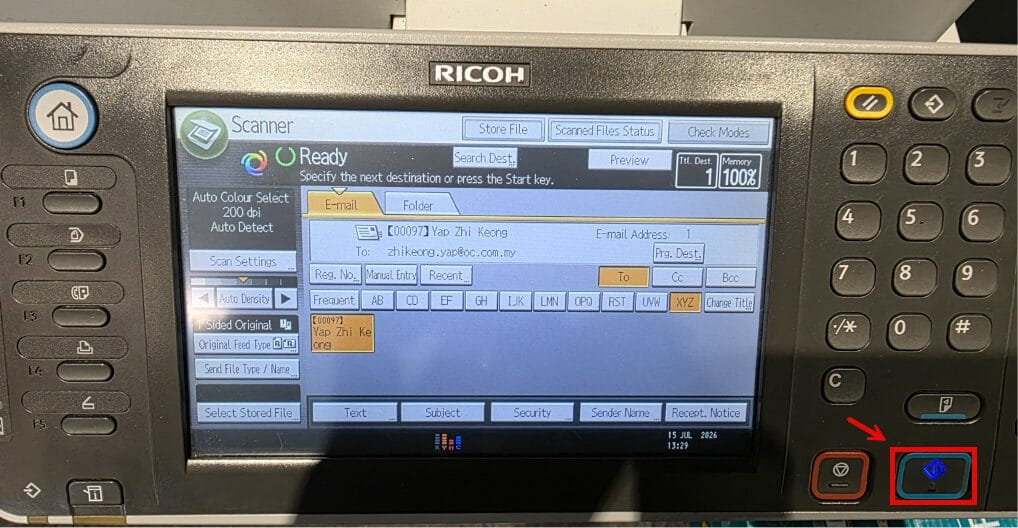
4. Start Scanning
Press the Start button (blue button) to begin scanning.
5. Additional Step for the Level 2 Ricoh Printer (Level 2 Printer Only)
After pressing the Start button, the Select Sender screen will appear.
- Select scandoc@ocsports.com.my as the sender.
- Press the Start button again to begin sending the scanned document.
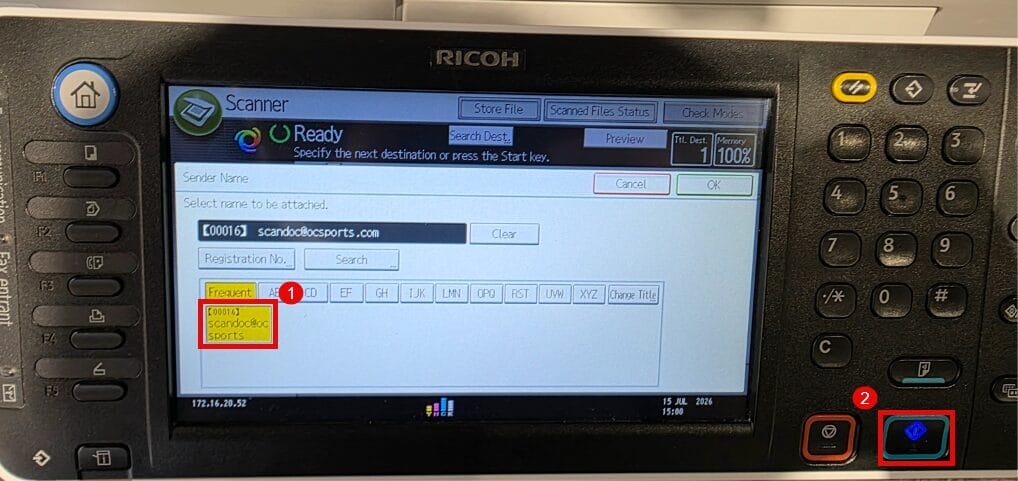
Note: This step is only required for the Level 2 Ricoh Printer. Users on other Ricoh printers can skip this step.
6. Retrieve Your Scanned Document
Once scanning is complete, check your email inbox for the scanned document.
If you do not receive it within a few minutes:
- Check your Junk or Spam folder.
- Search for emails from scandoc@ocsports.com.my.
If you still cannot find the scanned document, please contact the IT Department for assistance.
end