Skip to content
Original Classic Portal
  • Outlet Lists
  • News
  • Employee Directory
  • Stores Locator
  • KnowledgeBase
  • IT FormsExpand
    • IT Equipment Checkout
    • Outlet IT Assets Handover Form
Original Classic Portal
Popular Search closinghow topromotionhowcancel

POS System

  • How to Delete Goods Receiving Record (GRR) in ARMS?
  • How to Cancel Goods Receiving Note (GRN) in ARMS?
  • How to Exclude Items from Promotions in ARMS POS?
  • How To Cancel Bill in ARMS POS?
  • How To Reprint Transaction and Settlement?
  • How to Redeem Voucher in ARMS POS?
  • How to Redeem Coupon in ARMS POS?
  • How To Force Close and Restart ARMS POS When Not Responding?
  • How to Create a Temporary SKU in ARMS POS?
  • Atome BNPL Payment
  • How to Unlock ARMS POS?
  • How to login ARMS POS System?
  • How to logout from POS System?
  • How to cash in (float money) into POS system?
  • How to issue receipt/invoice? (without promotion item)
  • How to issue receipt/invoice for bundle promotion?
  • How to perform Item Discount?
  • Reprint Receipt
  • Why I unable to refresh (F5 key) the POS system screen?
  • How to delete item/SKU in POS system Screen?
  • How to Prune Receipt?
  • How to perform Goods Return (Exchange)?

Inventory

  • How To Perform Goods Receiving with Delivery Order (DO)? (Stock In)
  • How To Perform Goods Receiving with Purchase Order (PO)? (Stock In)
  • How To Perform Delivery Order (DO) Transfer? (Stock Transfer)
  • How To Perform Delivery Order Checkout?

Account

  • Atome BNPL Payment

OC Membership

  • How To Redeem a Coupon from OC Membership
  • How To Issue Receipt with OC Membership
  • OC Membership – Register as new member

Ticketing System

  • OC Helpdesk User Guideline (Ticket Submission)

Microsoft

  • How to Book a Meeting Room in Microsoft Outlook
  • Microsoft Teams Communication
  • How to Create a Team and Channel in Microsoft Teams
View Categories
  • Home
  • KnowledgeBase
  • Microsoft
  • How to Book a Meeting Room in Microsoft Outlook

How to Book a Meeting Room in Microsoft Outlook

Welcome to OCHQ Staff Meeting Room Booking Guide

This guide will help you:

  • Reserve meeting rooms efficiently
  • Avoid scheduling conflicts
  • Ensure all attendees are notified

You will find step-by-step instructions, including:

  1. Opening Outlook and creating a meeting
  2. Filling in meeting details
  3. Selecting the appropriate meeting room
  4. Confirming your Meeting Room booking
  5. Check schedule in Calendar

1. Open Outlook and Create a Meeting with Appointment

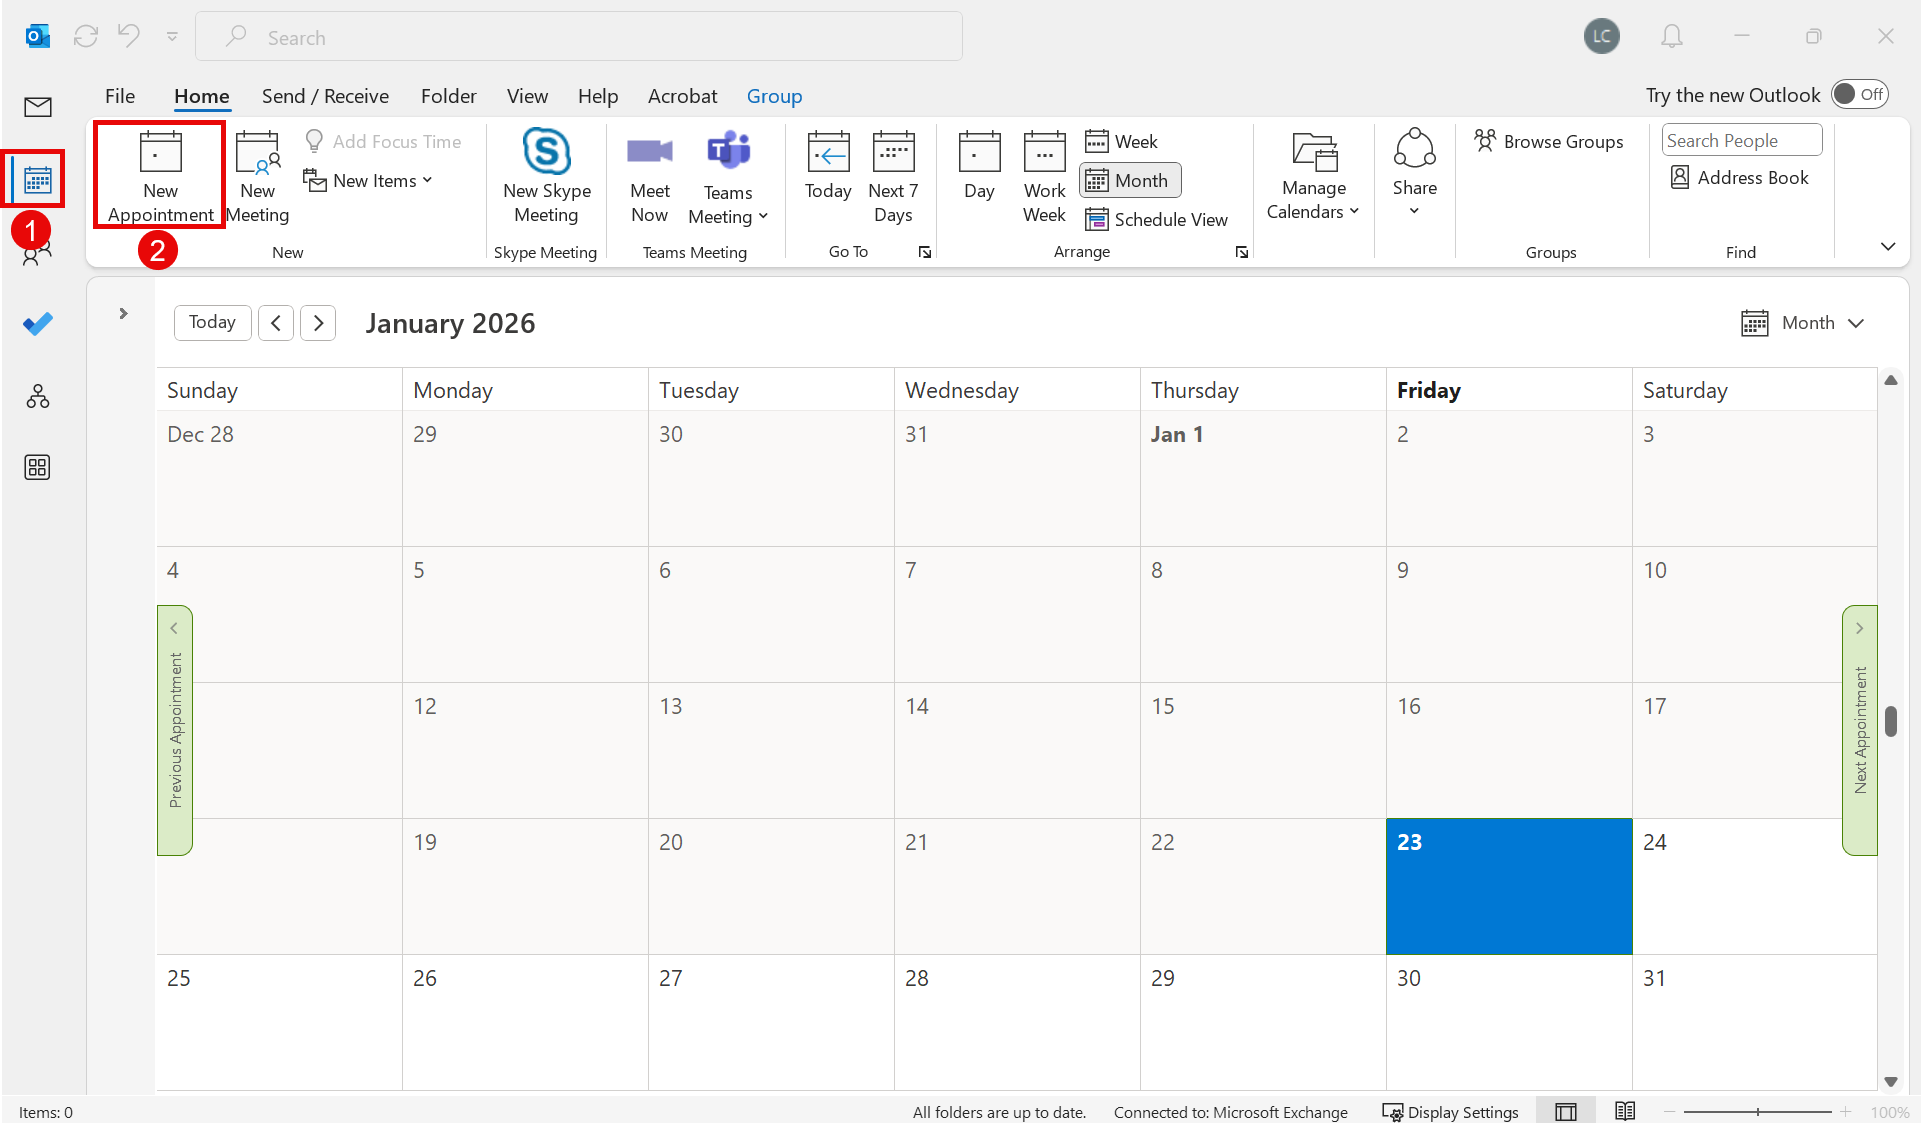
  • Click on the Calendar icon
  • Click New Appointment

2. Fill in Meeting Details

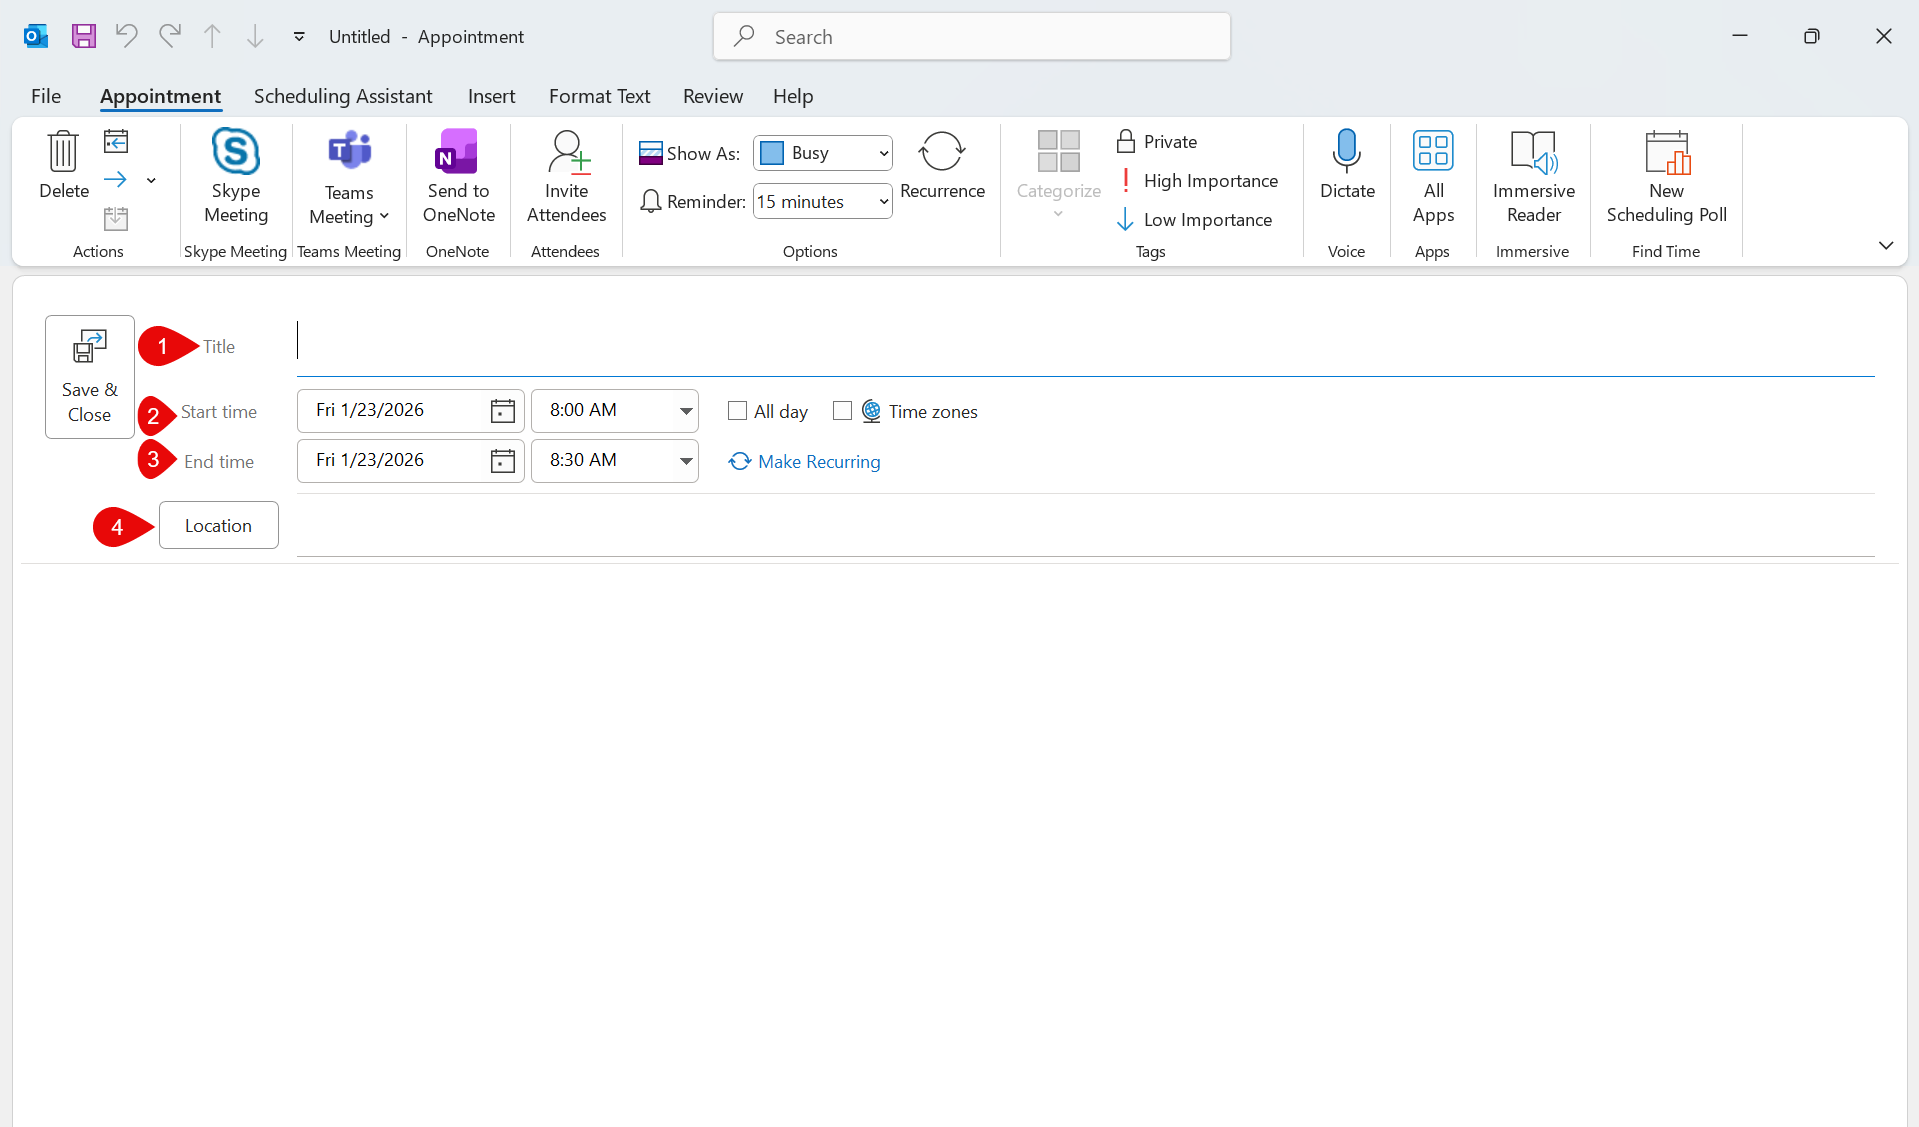
  • Title: Enter the title or subject of your meeting.
  • Start and End Time: Specify the meeting start time and end time.
  • Location: Click on the location field to select or enter the meeting room.

3. Choose the preferred meeting room

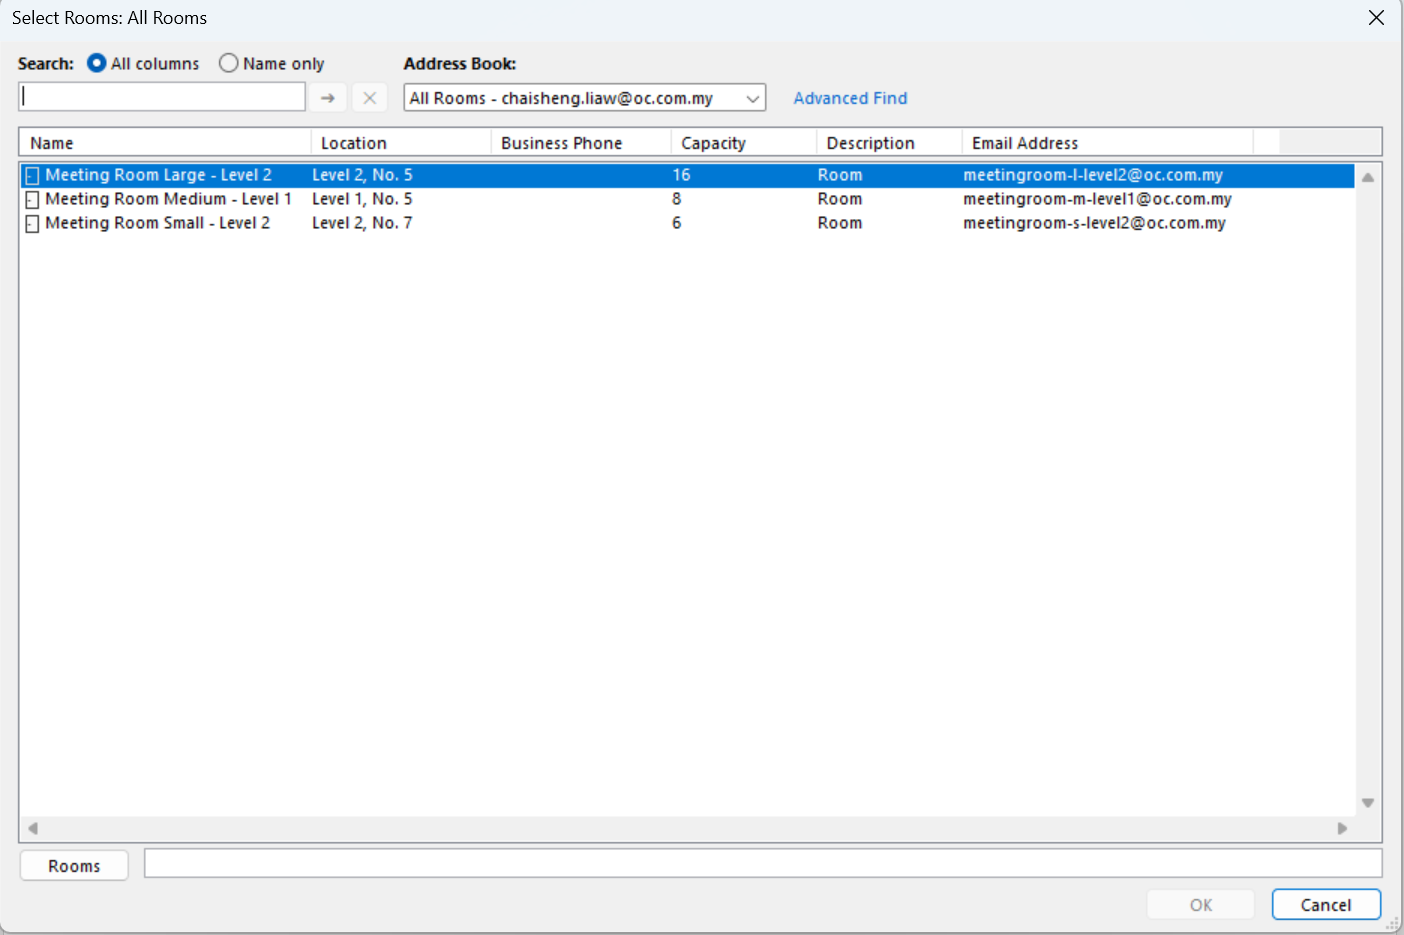
Select & Double Click the meeting room from the available options:

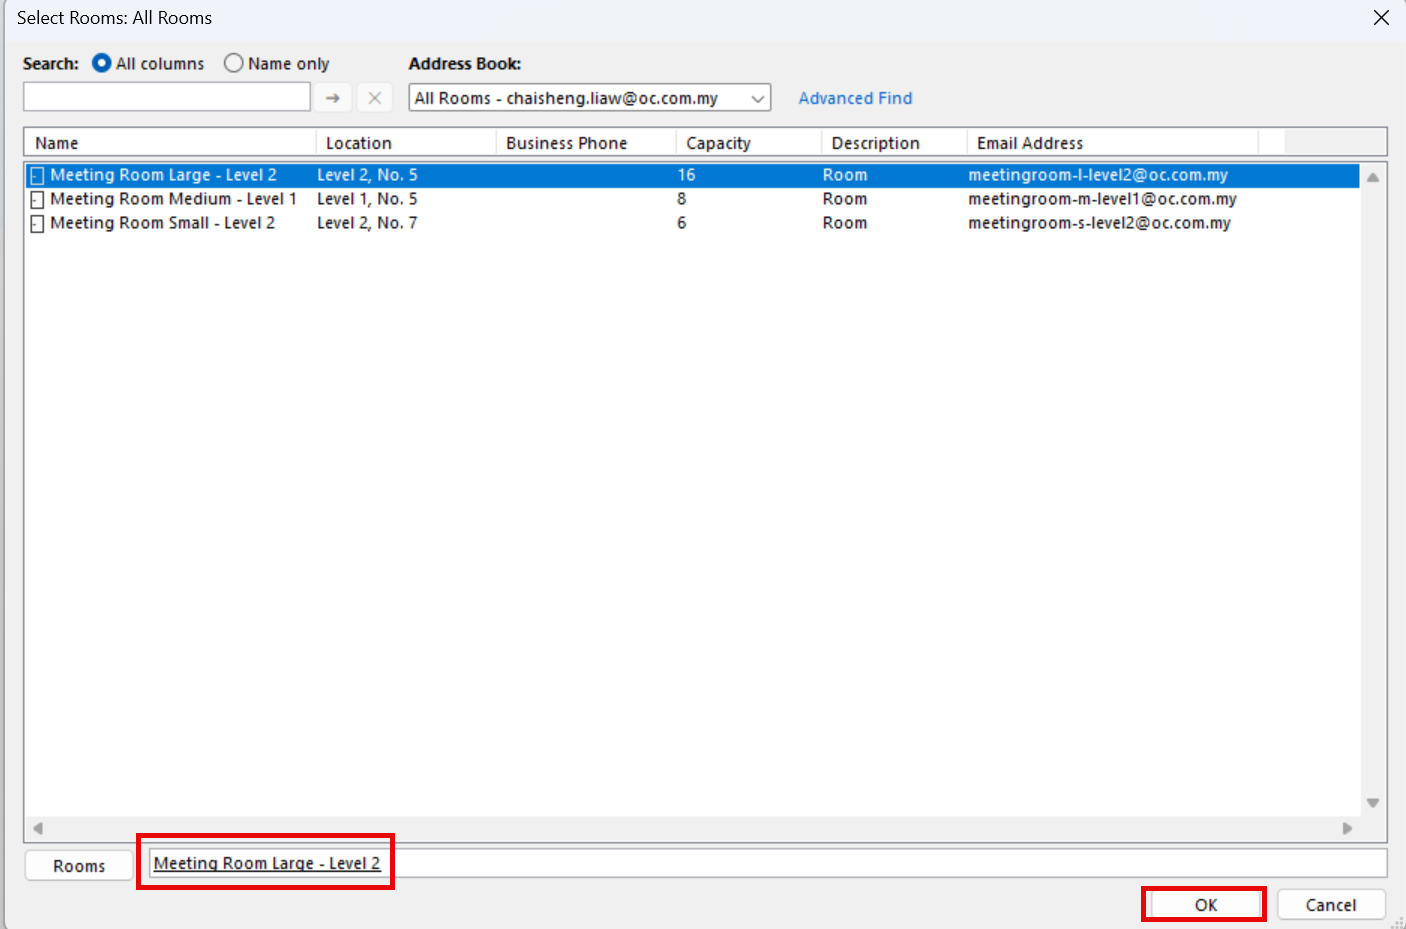
  • Meeting Room Medium – Level 1
  • Meeting Room Large – Level 2
  • Meeting Room Small – Level 2
  • Meeting Room Selected, Click OK

4. Verify Meeting Room Booking

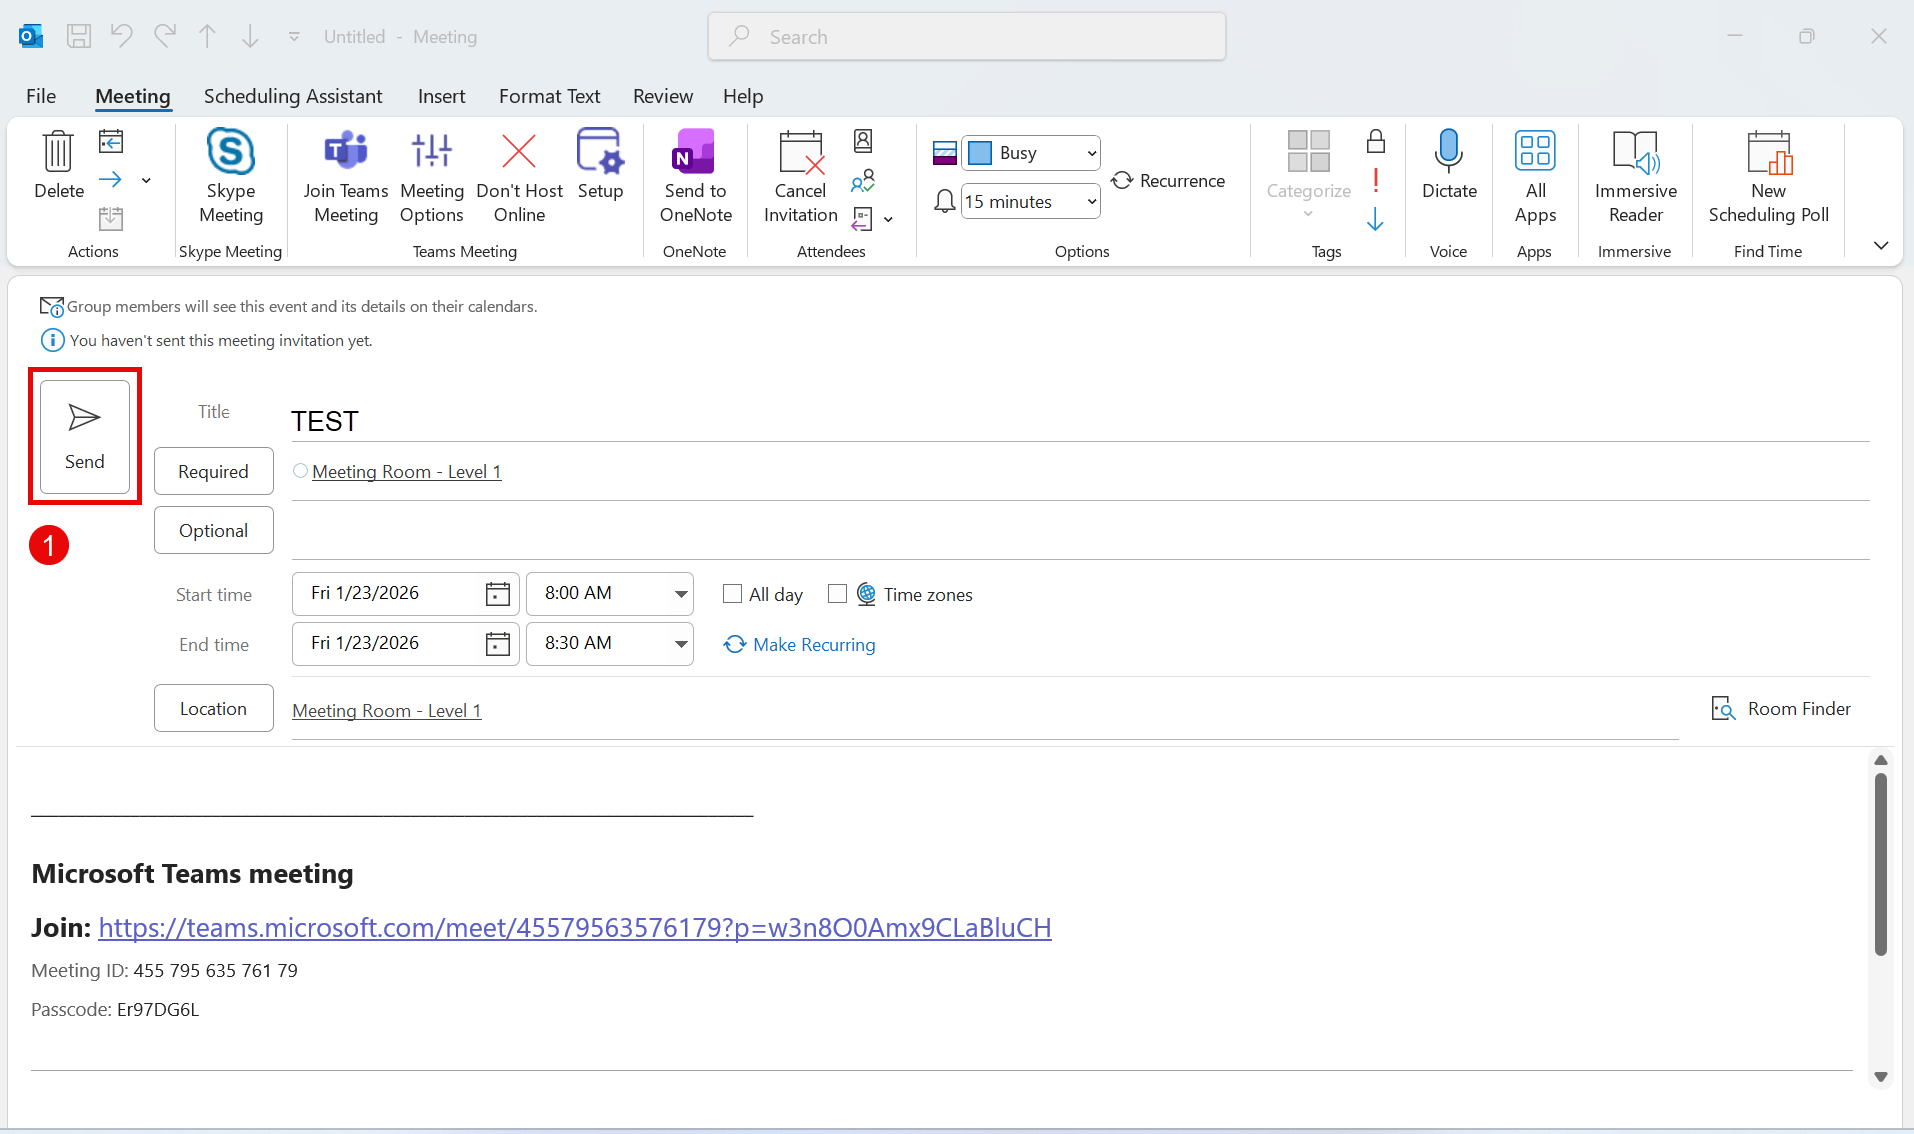
  • Send Invitation: Click Send to finish booking the room and schedule the meeting.
  • Room Picked: Ensure the selected meeting room is correct.

5. Check schedules in Calendar

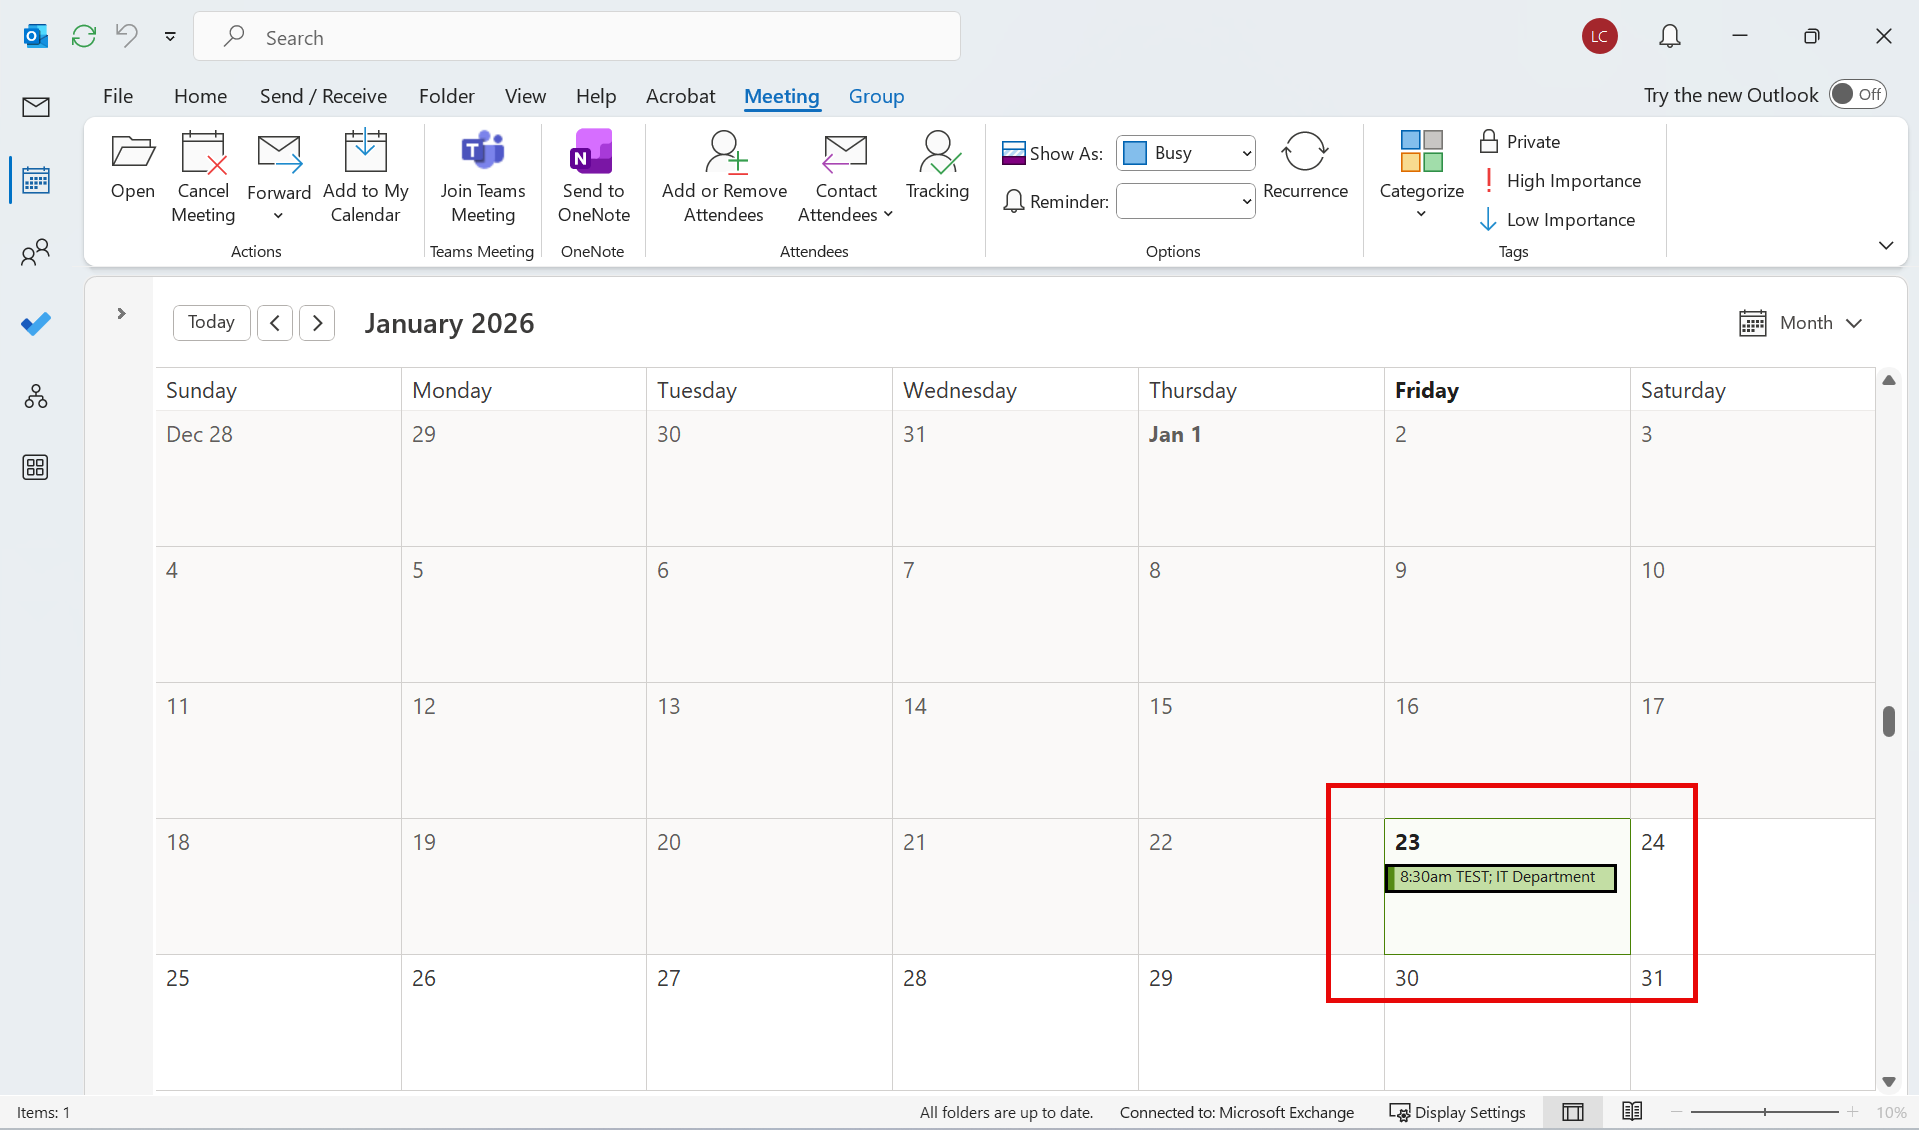
  • Check your calendar: The booked room will appear in your Outlook calendar.
  • Room availability: Other users will not be able to book the same room for that time slot.

Updated on 27/01/2026
How to Create a Team and Channel in Microsoft TeamsMicrosoft Teams Communication
  • Outlet Lists
  • News
  • Employee Directory
  • Stores Locator
  • KnowledgeBase
  • IT Forms

© 2026 Original Classic Portal

Scroll to top
  • Outlet Lists
  • News
  • Employee Directory
  • Stores Locator
  • KnowledgeBase
  • IT Forms
    • IT Equipment Checkout
    • Outlet IT Assets Handover Form