
1. Position your mouse cursor in the scanner area (highlighted in yellow below). Click once to activate the scanning function before proceeding to scan the item’s barcode.
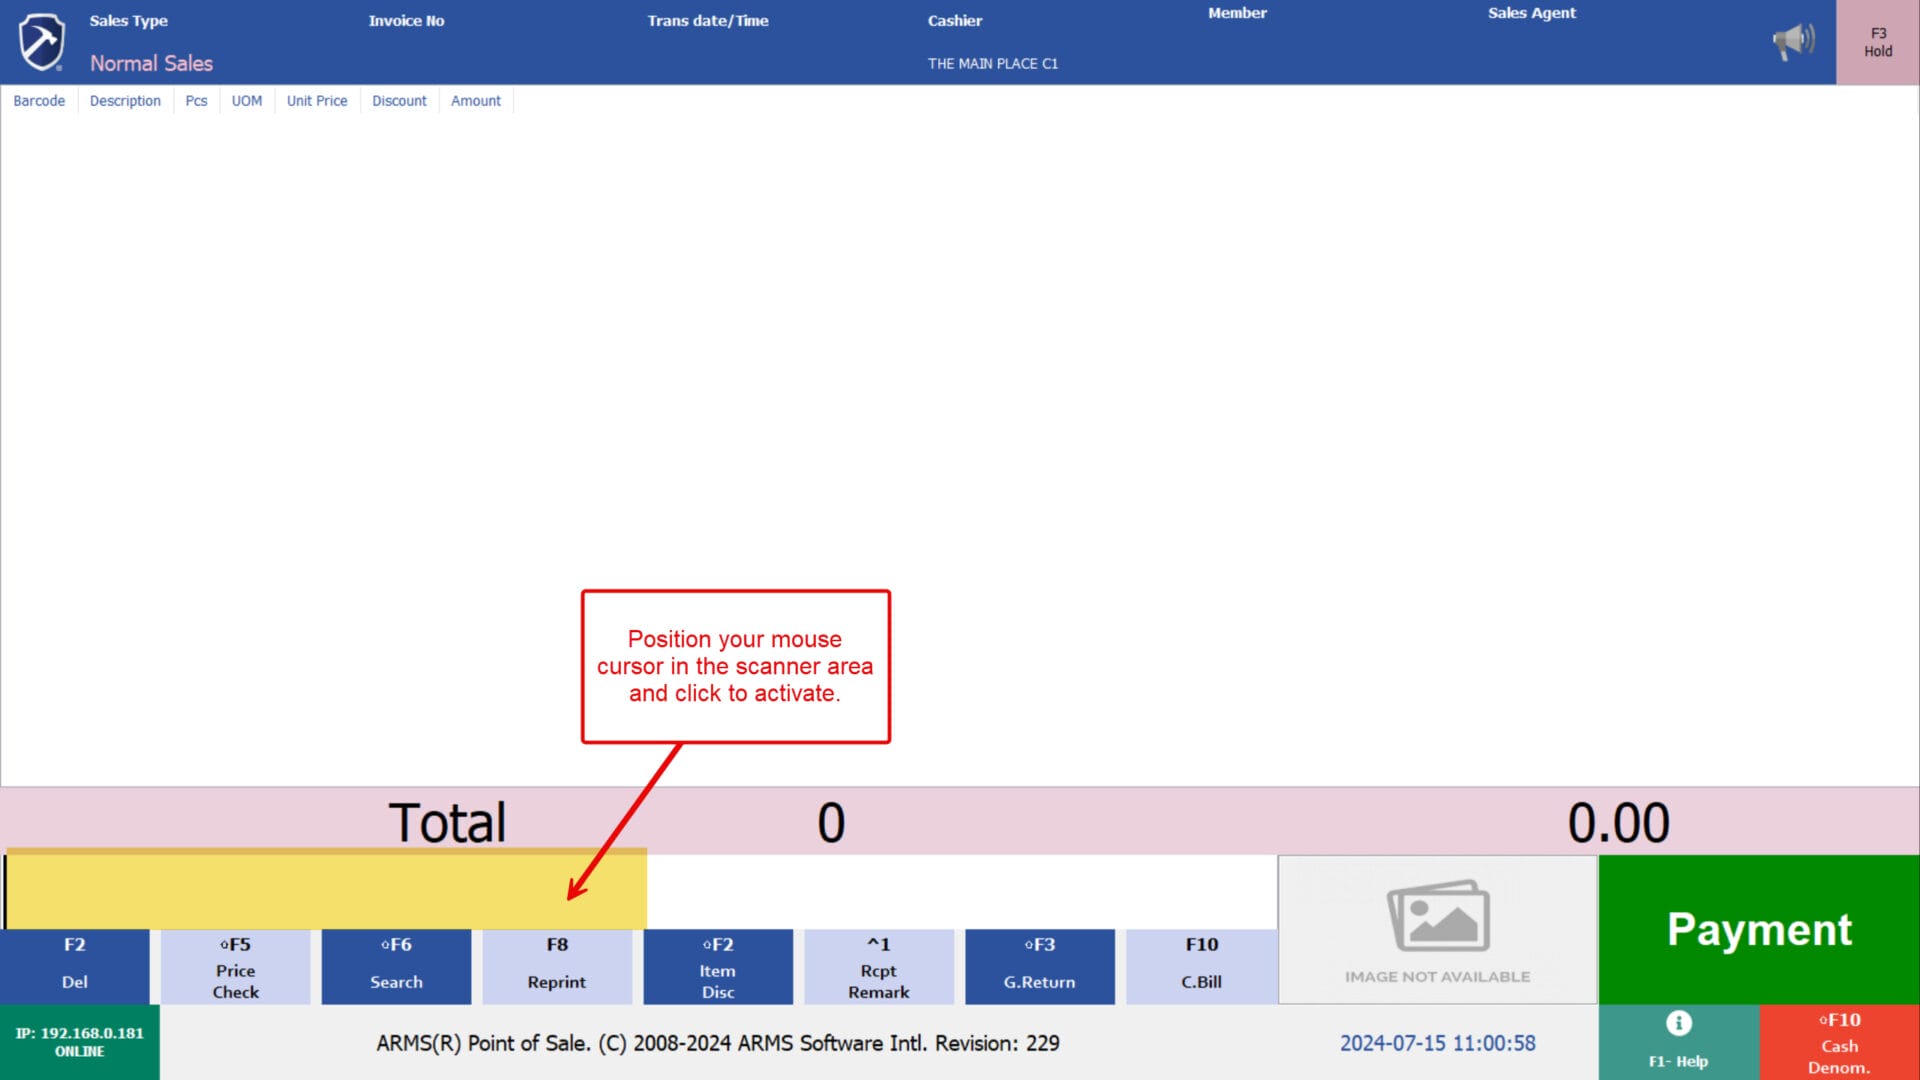
2. Then proceed to scan the item barcode.
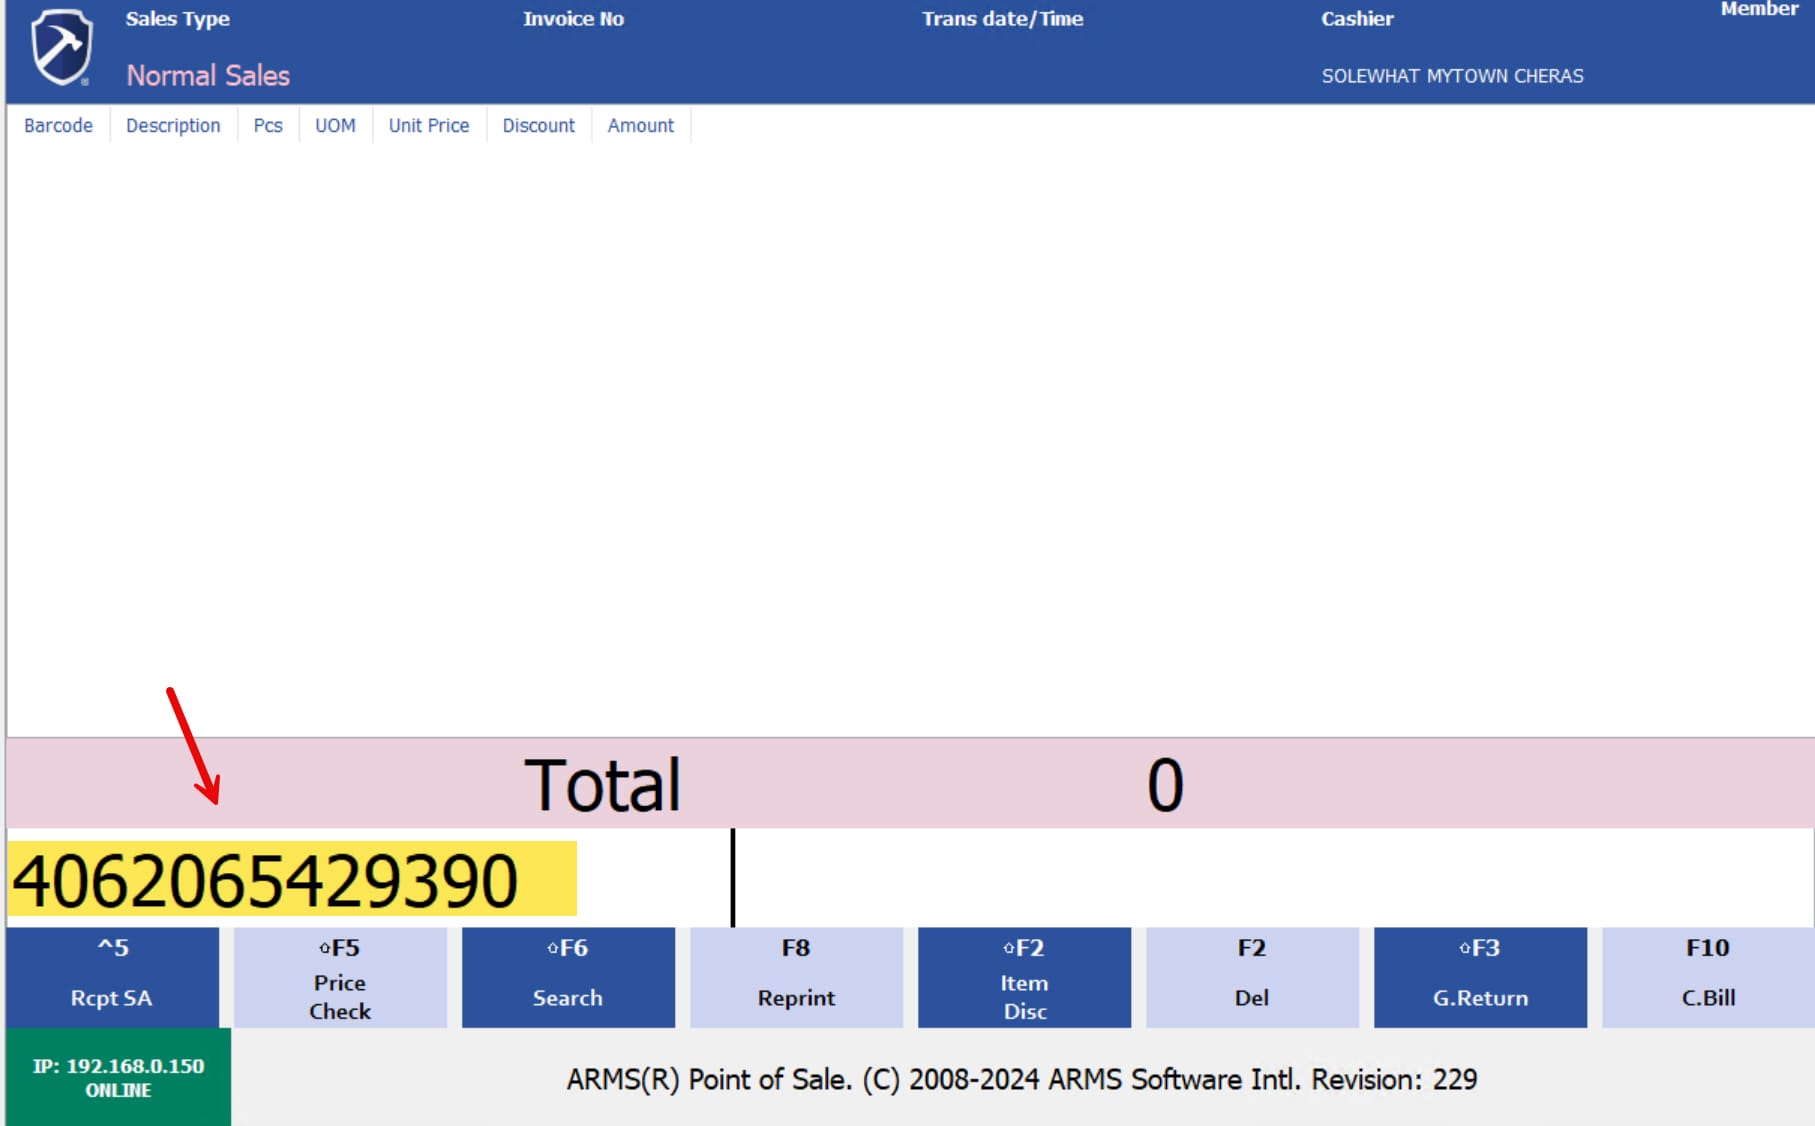
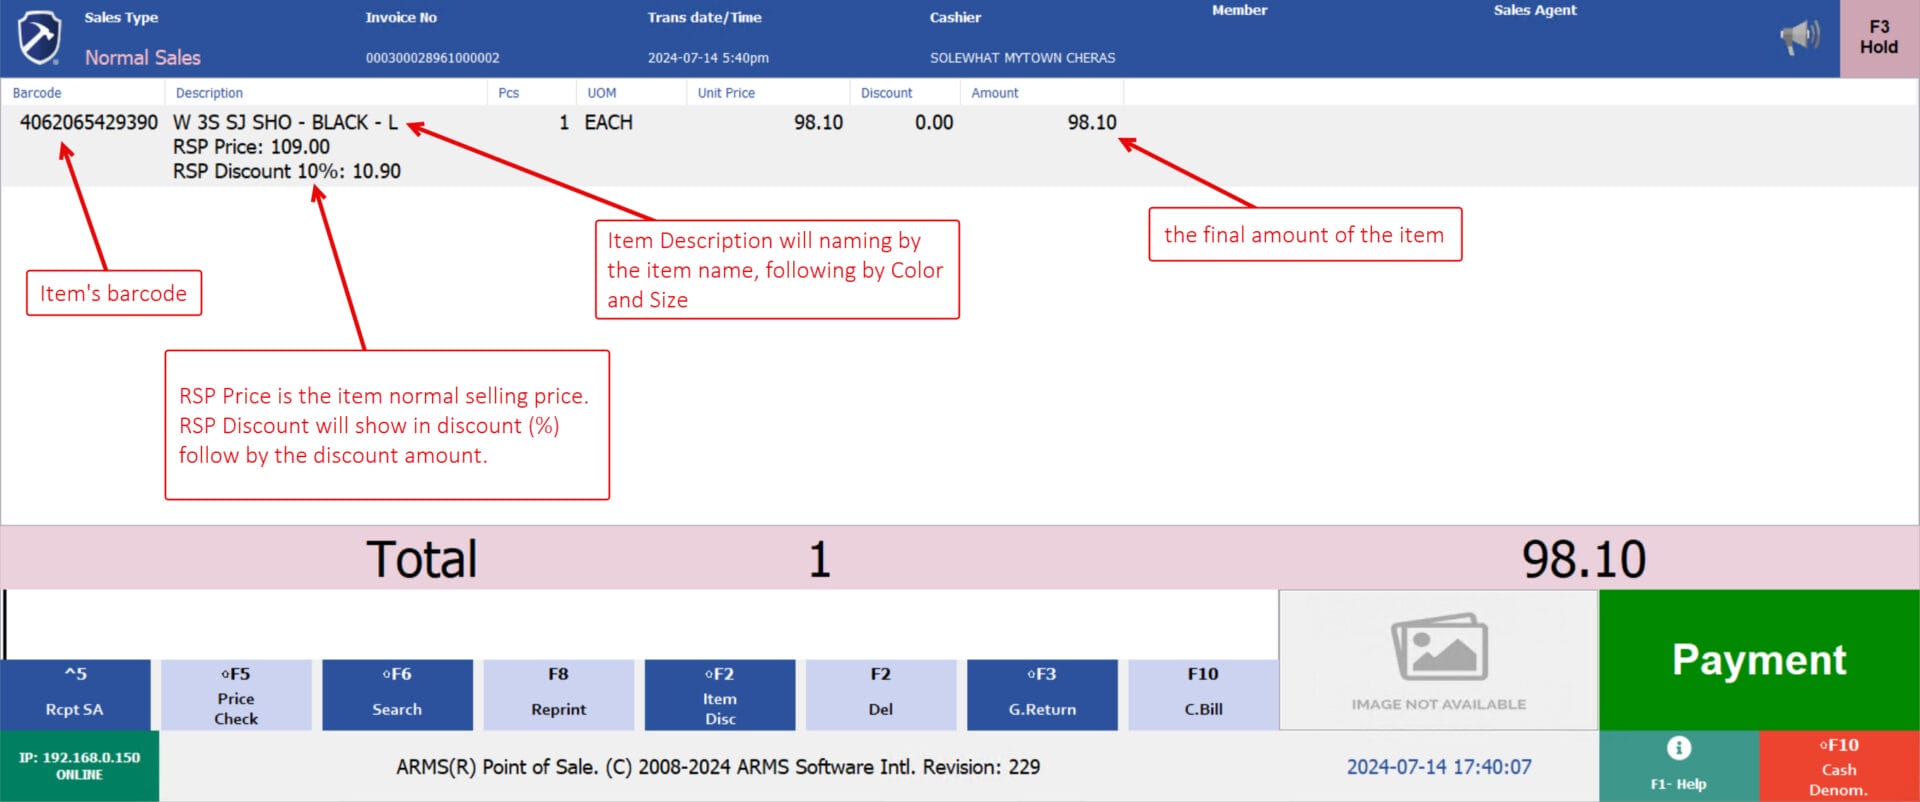
3. After the scanned the item, the POS will show the item barcode, descriptions, RSP details and the net amount.
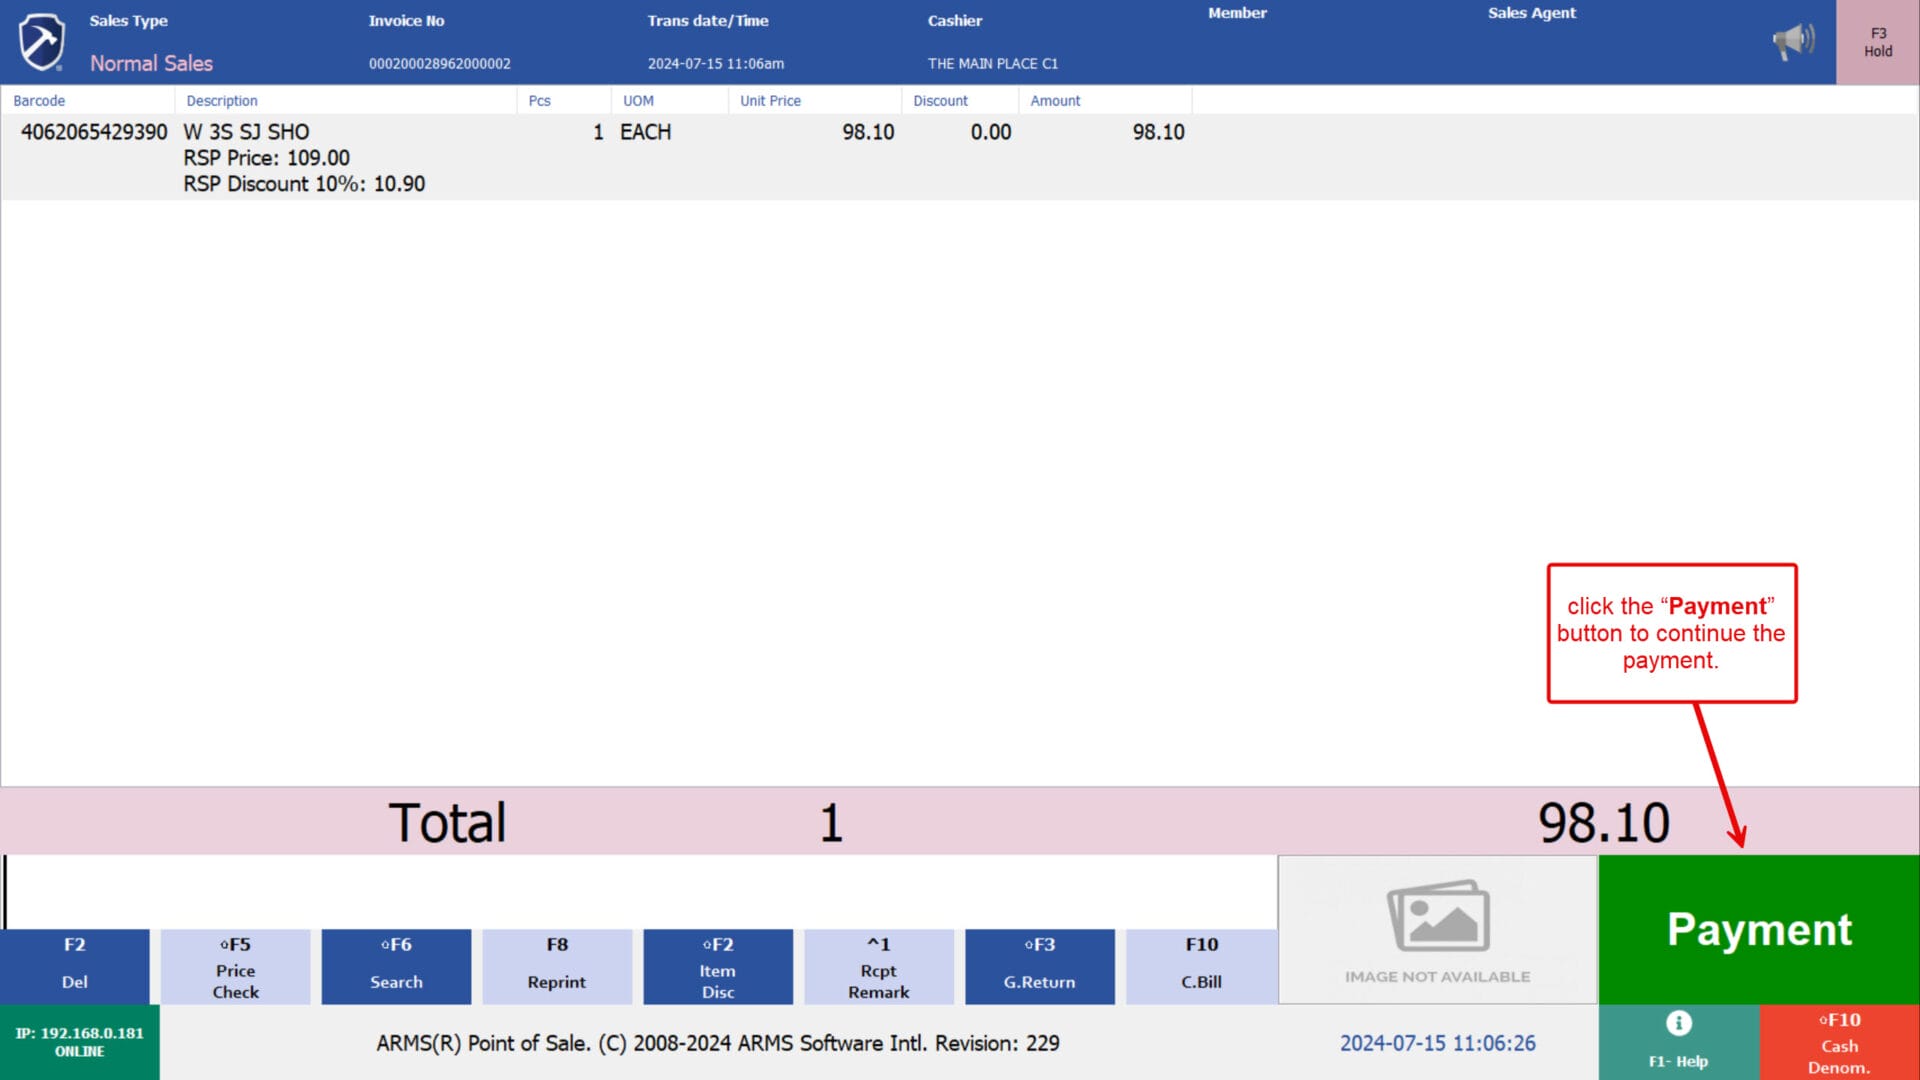
4. Then click the “Payment” button to continue the payment.
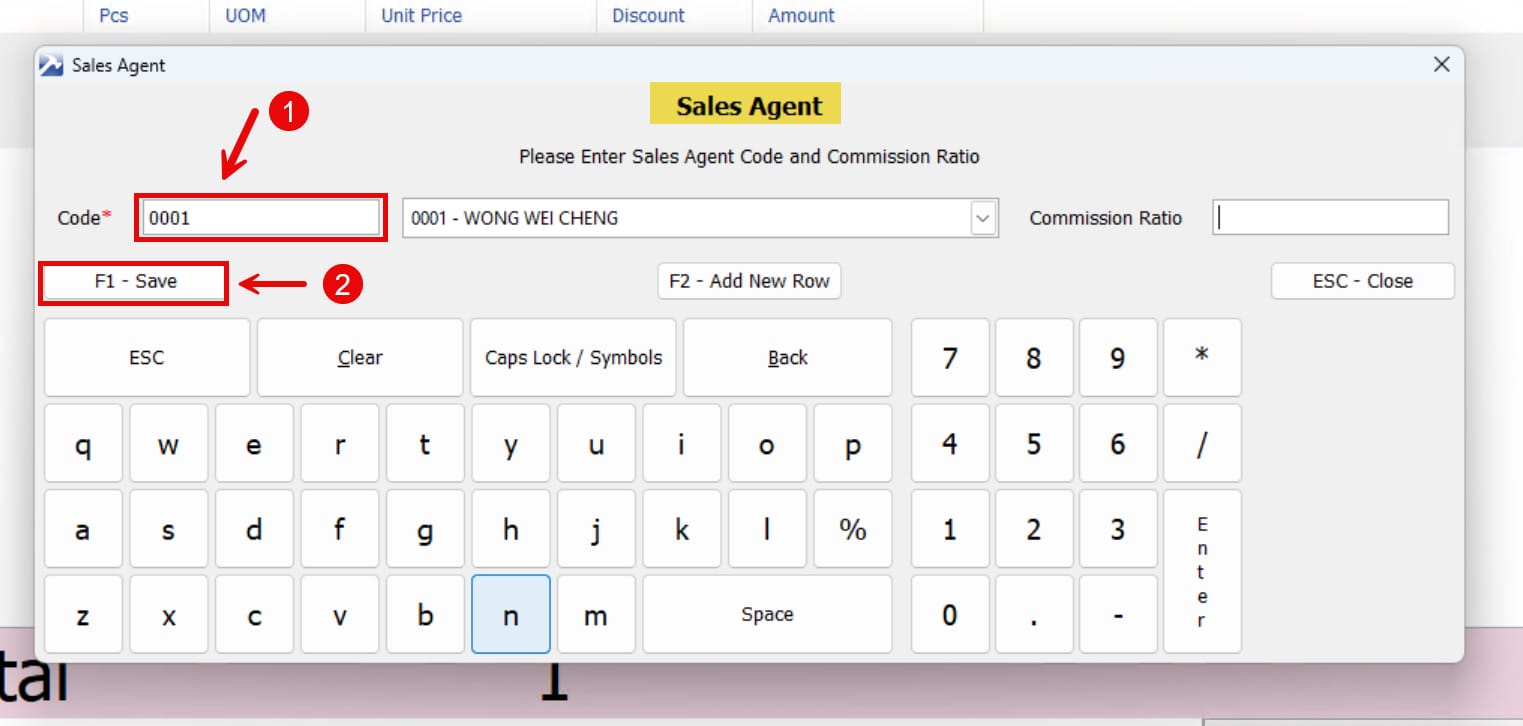
5. The POS system will display the “Sales Agent”. Input your Sales Agent ID, which is identical to your employee number. Alternatively, you can use the barcode scanner to scan the label on your employee badge. After entering your ID or scanning your badge, press the “F1 – Save” key to proceed.
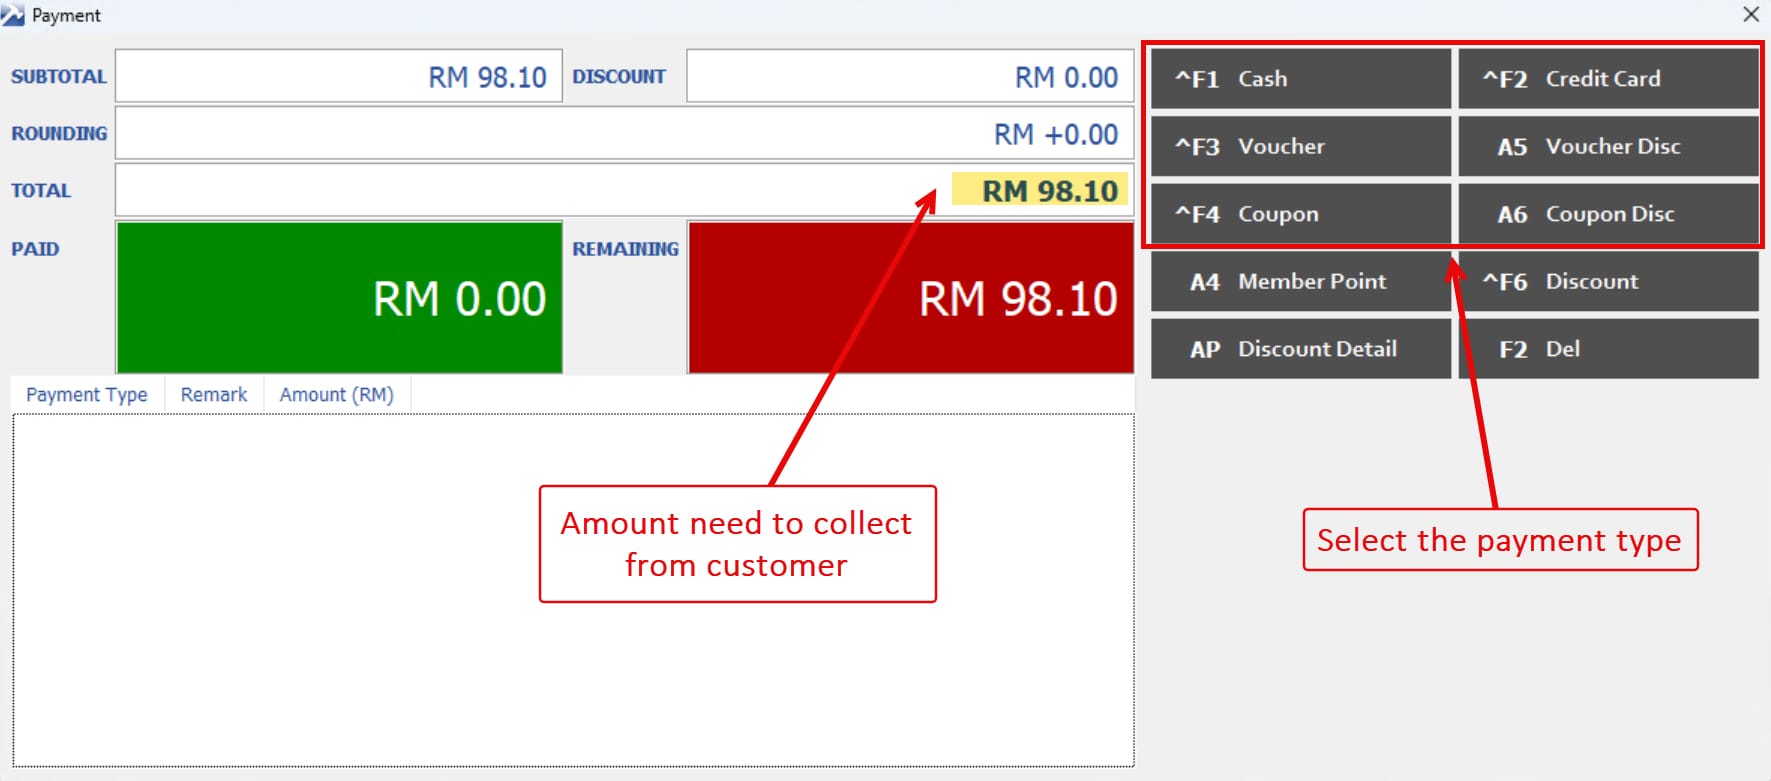
6. On the payment screen, choose the appropriate payment method. For this example, let’s assume the customer is paying RM100 in cash. To process a cash payment, you can either:
- Click the “^F1 Cash” button on the screen, or
- Press the SHIFT and F1 keys simultaneously on the keyboard.
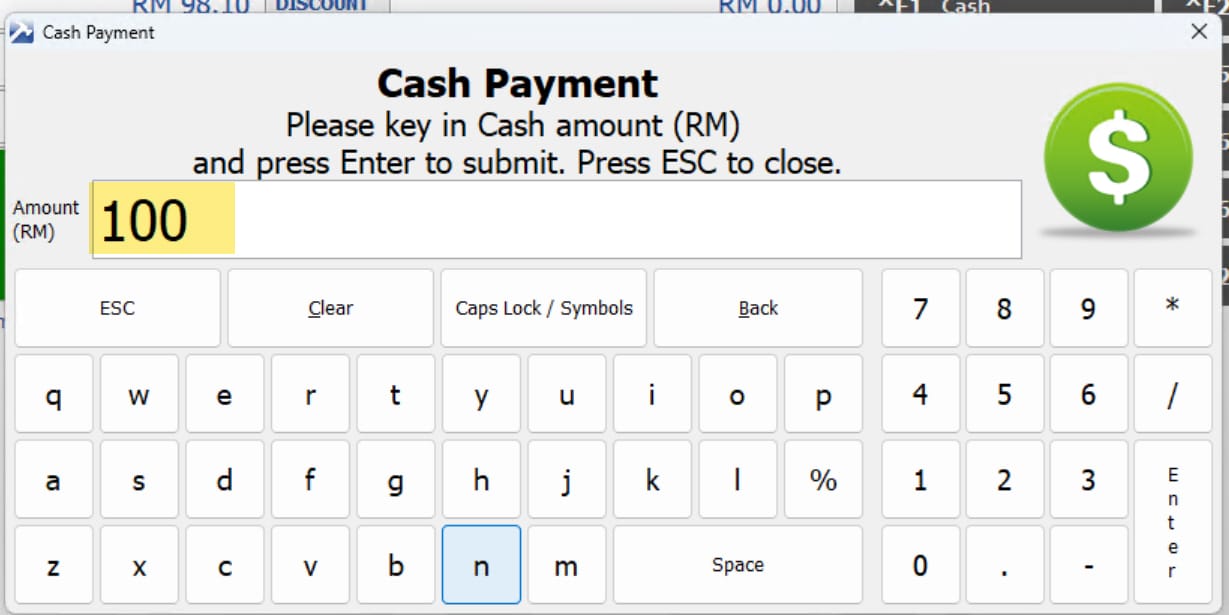
7. Input the amount of money given by the customer, then press the Enter key to proceed.
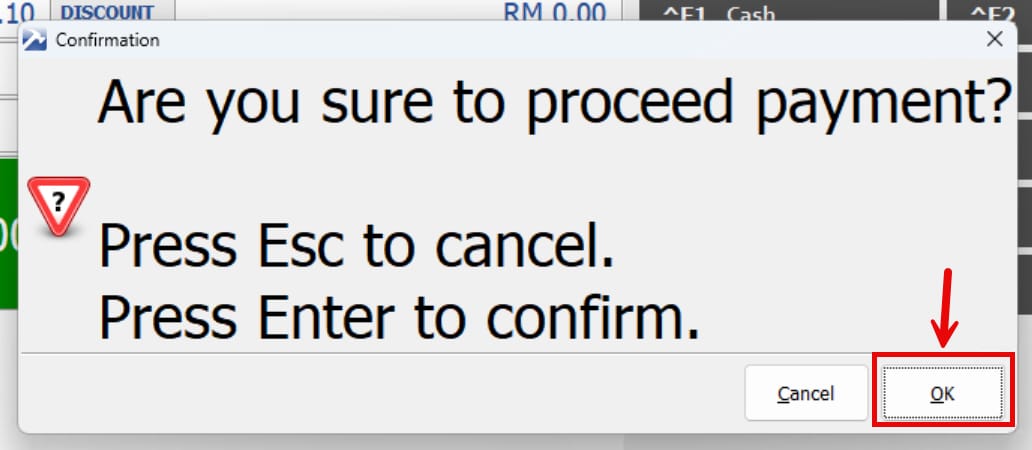
8. The POS system will display a confirmation prompt. To confirm the transaction, Click the “OK” button on the screen, or press the Enter key on the keyboard to proceed.
If you need to make changes or cancel the transaction, select the “Cancel” option to return to the previous payment screen.
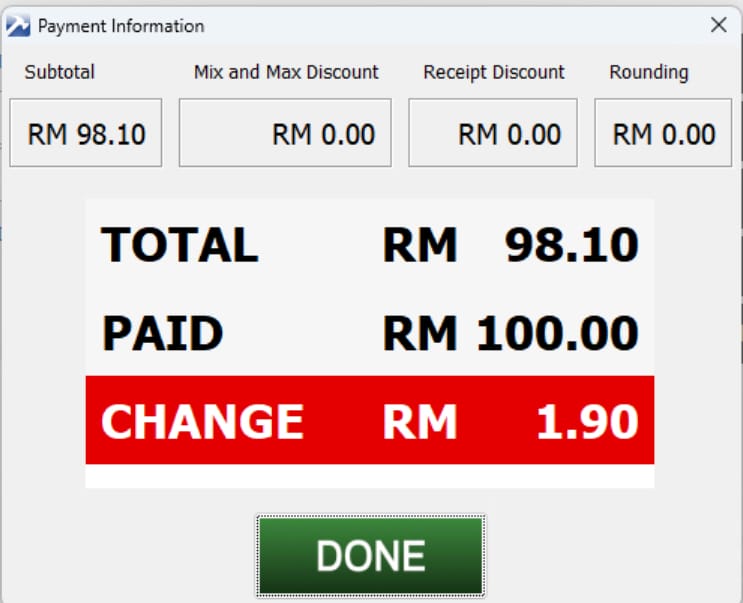
8. After confirming the transaction, a payment information screen will appear, and the system will print a receipt. If the customer is due any change, the amount will be displayed on this payment information screen. Please return the correct change to the customer as showed.
end